
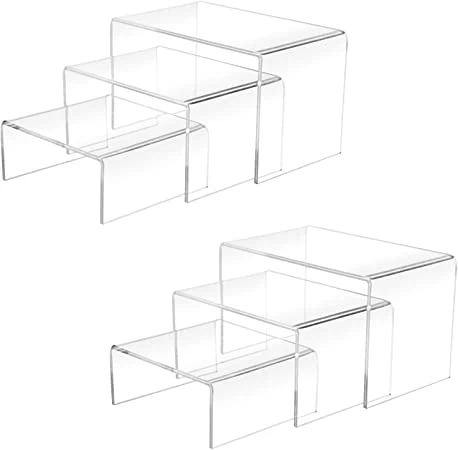
Have you considered using anime figure risers to improve your display game? Anime figure risers make a world of difference in improving your anime figure display case. They are a necessity if you are serious about the aesthetics of your anime figure display.
What are Anime Figure Risers?
Essentially, display risers are small platforms designed to elevate your figures to a higher level, providing a better view of the figures on display. Many people refer to them as action figure risers, action figure display risers, anime figure risers, anime figure display risers, figure display risers, or just simply display risers. They’re all one and the same.
Why Even Buy Anime Figure Risers?
Maybe some collectors think anime figure risers are a waste of money. But that’s just because they have yet to see how much a display riser can improve the aesthetics of your collection. Once upon a time, I couldn’t care less about anime figure risers. But I have since been converted. I now believe that figure display risers are essential for every collection.
If you have a shelf with several figures, I can imagine some of those figures are relegated to the back row. These figures in the back row will hardly get any attention as many of their details may be blocked from the front view. Sure you can position figures in the back at an angle to reveal more but that most likely still covers some details. Anime figures are too pricey and too beautiful to just be blocked from view. Give them the spotlight that they deserve by giving them more height. The back row of your display should not just be a place to harbor older figures in your collection. Each figure deserves the spotlight. And this is where figure risers come in handy.
Where to Buy Figure Risers?
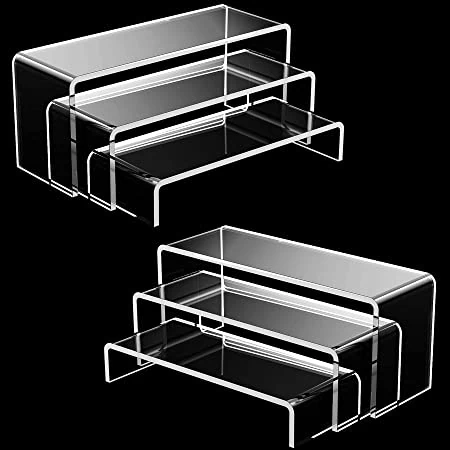
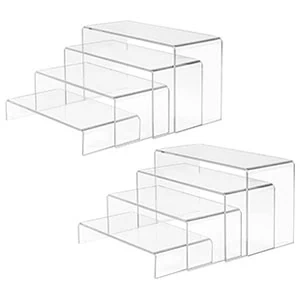
With the rise of many online shopping platforms, anything is easy to find nowadays. You can buy anime figure risers on many online marketplaces like Amazon. Below you can see some popular options for anime figure risers that you can buy on Amazon.
How to Make Custom Figure Risers?
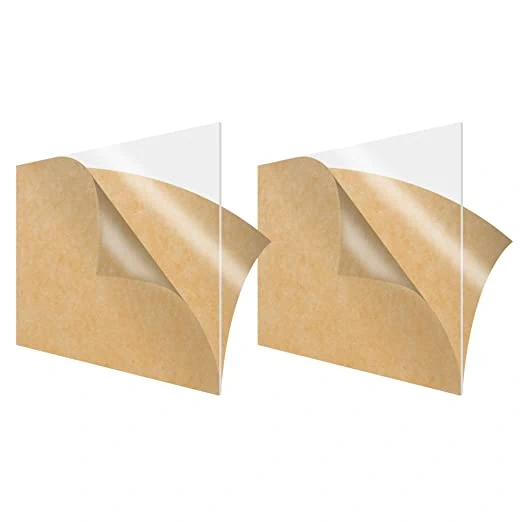
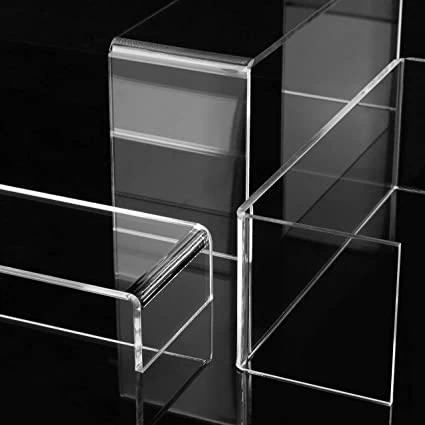
Figure risers are already quite cheap but there are still benefits if you want to make your own custom figure risers. Most notably, you can make risers that are of the exact size that you need for your display. Sometimes it can be difficult to find a riser of the exact size that you need. So being able to make the size you need can work wonders for the aesthetics of your display. Figure risers are usually made of acrylic so if you want to unleash your inner handicraft master, you can start with buying some acrylic sheets.
Also, before we get to the nitty-gritty, I would recommend watching the video below so you have some basic information about working with acrylic.
DIY Riser By Folding Acrylic
To make a custom riser by folding acrylic, you’ll need a few things. Some of these things you might already find at home. If not, the links below point to Amazon where you can buy everything you need for this project.
- acrylic sheet (3mm)
- a hacksaw or utility knife (for cutting the acrylic sheets)
- tape measure
- rough and fine sandpaper
- heat gun (alternatives: hair dryer, stovetop)
- any long piece of wood or metal to guide the cutting of the acrylic
To make your custom figure riser by folding acrylic sheets, you can follow the instructions below.
- Measure the base of the figure you want to create a riser for. Take the length and width. Determine how much elevation you need on your riser.
- Determine the measurements of the acrylic to cut. To get the total length of the piece you are going to cut, take the height and multiply it by 2 and then add it to the length of your base. For example, if the riser, you want should have a length of 15cm, a height of 7cm, and a width of 10cm, you’ll want to cut a piece measuring 34cm by 10cm. New acrylic sheets come with a protective covering so feel free to write over it for the outline of the piece that you are going to cut.
- Now it’s time to cut your acrylic sheet. You can use a hacksaw or a utility knife. If you are using a knife, make use of any straight instrument that can help guide your cut into a straight line. Make straight firm cuts on both sides of the acrylic. After making deep enough cuts on both sides, apply equal pressure on both sides of the acrylic piece to snap off the piece you are cutting.
- After cutting, you use the rough and smooth sandpaper to smooth the edges. You’ll want to start with the rough piece and then move on to the smoother piece to create clean edges. This step is optional but having clean edges on your risers really improves the aesthetics.
- Once you’re happy with the edges, it’s time to heat the acrylic so you can bend it to your desired shape. Make sure you remove the protective film on both sides of the acrylic sheet. Turn on your heat source and then hover the acrylic sheet over the heat. It is important that you do not hold the acrylic too close to the heat source or it will develop bubbles that are impossible to remove. Move the acrylic piece around to get even heat distribution across the part that you will be bending.
- When the acrylic starts to bend on its own, you’ll know it’s time to do the bending. You can use a straight piece of wood to hold the acrylic in place and another piece that you can use to bend the acrylic in a straight line. Hold it in place for a few minutes until it hardens.
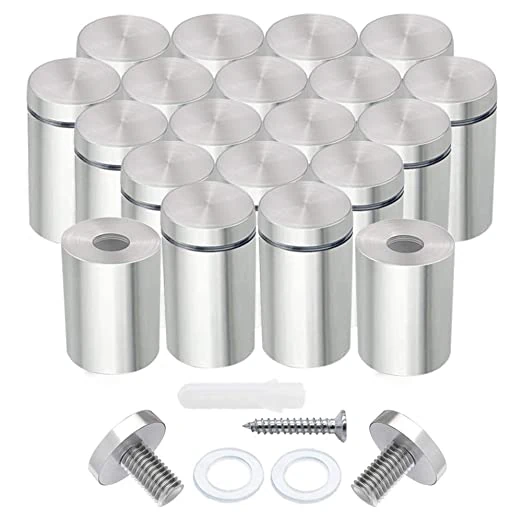
DIY Riser Using Acrylic and Mounting Screws
The second method makes use of glass screws or acrylic screws — also called standoff screws. This one is simpler and mostly safer to do compared to bending acrylic which can cause burns if you have an accident. This however would require drilling a hole into the acrylic.
What you’ll need:
- acrylic sheet (3mm)
- a hacksaw, a utility knife (for cutting the acrylic sheets)
- tape measure
- mounting screws
- rough and fine sandpaper
- power drill (or if you don’t want to use power tools, you can check out this hand drill)
To make your custom figure riser using acrylic sheets and mounting screws, you can follow the instructions below
- Take the measurements for the riser that you want to create.
- Cut the acrylic sheet to the desired shape using a hacksaw or a utility knife.
- Polish the edges of the acrylic using sandpaper.
- Mark the spot where you want to make the holes for the mounting screws. You can position the holes near the four corners of the acrylic but not too close to the edges as this will allow the acrylic to bear more weight. If you’re using a wide piece of acrylic for your custom riser, you should consider adding 2 more mounting screws so the acrylic doesn’t snap under the weight of the figure.
- Drill the holes in the acrylic.
- Remove the protective film on the acrylic.
- Remove the cap from the barrel of the mounting screw. You can just set aside the inner screw that is used for wall mounting. Fit the mounting screws to the holes you made on the acrylic and put the cap back on.
- You can now display your anime figures on your new custom riser.
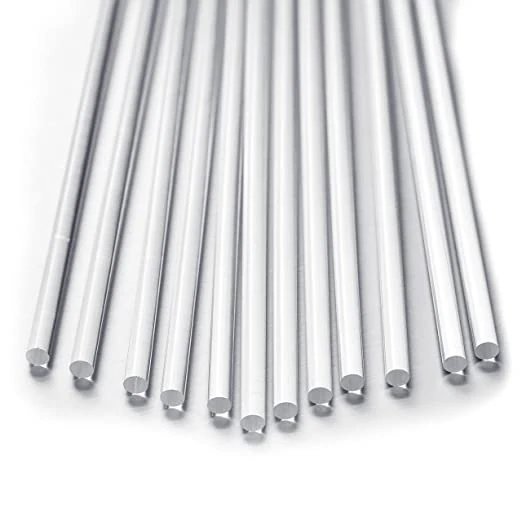
DIY Risers Using Acrylic Sheets and Acrylic Rods
The third method for creating DIY risers makes use of acylic sheets and acrylic rods. This time, in place of the mounting screws, we’ll be using acrylic rods for the pegs of the riser. Since the pegs will also be transparent acrylic, the entire riser will look almost invisible. And instead of screws, the acrylic rods will be attached using acrylic adhesive.
Fair warning, special care should be taken when handling acrylic adhesive. You should use rubber gloves and a face mask so you don’t inhale the fumes. Hopefully, you still have face masks left over from the pandemic. You’ll also need an applicator since you only need to apply a very small amount to bond the acrylic rod to the acrylic sheet. Any old paintbrush will do for this purpose. The acrylic adhesive does not actually glue the 2 pieces together. The process is more akin to welding the two pieces together as the acrylic adhesive melts the acrylic so they meld seamlessly.
Here’s a recap of what you’ll need:
- acrylic sheet (3mm)
- acrylic rods
- a hacksaw, utility knife (for cutting the acrylic sheets)
- tape measure
- rough and fine sandpaper
- acrylic adhesive
- face mask and rubber gloves
- paintbrush
Here are the steps to follow:
- Take the measurements for the riser that you want to create.
- Cut the acrylic sheet and rod to the desired shape using a hacksaw or a utility knife. If you need guidance with cutting acrylic, you can watch the featured video above.
- Polish the edges of the acrylic using sandpaper. Ensure the rods are the same length down to the last millimeter. Any difference in size can cause your riser to wobble.
- Remove the protective film on the acrylic sheet. Mark the spot where you’ll be positioning the rods.
- Wear your face mask and rubber gloves.
- Using the paintbrush to dab acrylic adhesive on two surfaces you want to meld together. You only need a tiny amount of the adhesive so don’t use more than necessary as this will significantly increase drying time. Stick the two pieces together. If you splatter the adhesive onto a different spot. Don’t wipe it off. Just leave it to dry.
- Repeat this process unless you attach all the legs of your riser.
- The adhesive should dry in a few minutes but you should allow 24 hours of curing time for a better bond.
If you can’t be bothered to buy acrylic rods, you can also just use smaller pieces of acrylic sheets as the legs. You’ll just have to apply the adhesive to a wider area.
Make Risers from Boxes, Jars and Other Stuff
If you think bending acrylic sheets to create customer risers is a bother, you can just get creative. Small cardboard boxes, jars, teacups and other thingamajigs can make for good risers. Any material that can elevate your anime figures can be used as risers. Your local crafts shop can be a haven for makeshift risers. The only limit is your imagination.
How to Use DisplayRisers to Improve My Anime Figure Display?
Here are some tips on how to use risers to improve your display.
Figures in the Back Will Benefit the Most from Risers
When arranging your figures on the display, keep in mind that the figures placed at the back may not be as easily visible compared to those in the front. By using risers, you can elevate the figures in the back, bringing them closer to eye level and ensuring that they are not overshadowed by the figures in the front. This allows all your figures to receive the attention they deserve and creates a balanced and harmonious display.
Group Figures Strategically
Utilize your risers to create visually appealing groups of figures. Arrange figures from the same series or with similar themes together on a single riser. This helps to create a cohesive and organized display that tells a story or showcases your favorite characters.
Create Depth and Variation
Experiment with different heights and sizes of risers to add depth and variation to your display. Place taller risers at the back and shorter ones in the front to create a layered effect. This arrangement will make your display more visually interesting and dynamic.
Use Different Angles
Instead of arranging your figures in a straight line, try positioning some of them at angles on the risers. This adds movement and creates a more dynamic composition. Angled placements can also help highlight specific features or create a sense of interaction between the figures.
Highlight Focal Points
Designate specific risers as focal points for your most prized or favorite figures. Place these figures on higher or central risers to draw attention and make them stand out. Consider using additional lighting or spotlights to further emphasize these focal points.
Consider Backgrounds and Props
Enhance your display by using backgrounds or props that complement your figures and risers. For example, you can add a themed backdrop or small decorative items that match the series or characters you are displaying. This can create a more immersive and captivating scene.
Did I manage to convince you to use risers in your display? Whether you want to buy some or create custom ones, adding risers is sure to make your display much better.
I started the NekoFigs blog in January 2021, 5 years after I’ve started collecting anime figures. It all started with one humble prize figure of Saber Lily which was bought on a whim. Now, I have also started my own anime figure store which just means more box problems.
Leave a Reply